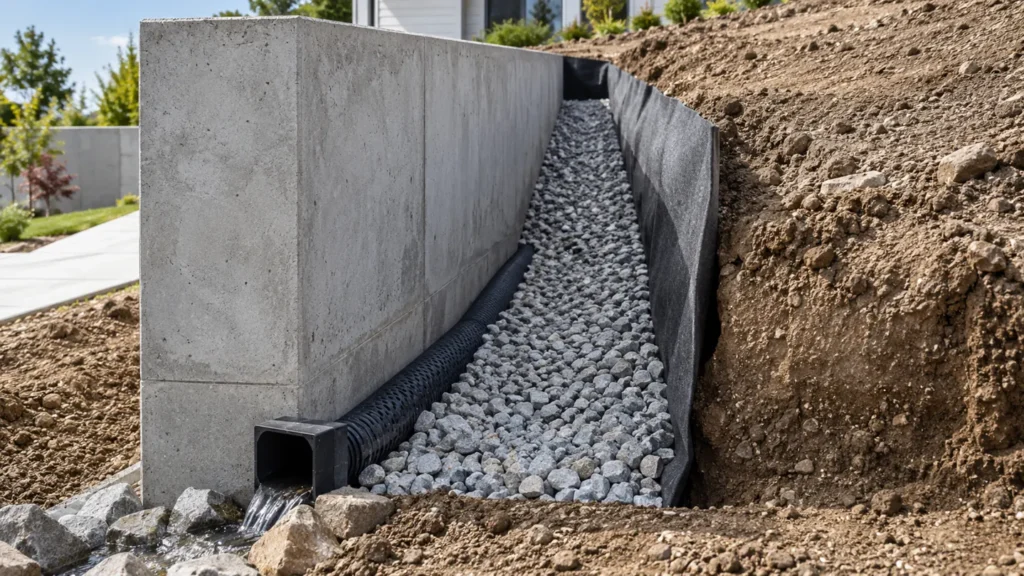
Retaining wall drainage must manage water as part of the wall and site design. A pipe behind the wall is only one possible component. Surface runoff, groundwater, soil conditions, and the discharge route all need consideration by the appropriate designers before construction begins.
A useful project brief follows water from its source to an acceptable outlet. It also explains how the wall materials and surrounding soil work with that drainage arrangement. These nine checks help owners evaluate a proposal, coordinate the relevant specialists, and preserve evidence of work that will become hidden behind the finished wall.
Table of Contents
1. Understand retaining wall drainage as a site system
The drainage plan should begin with the whole site rather than the wall footprint alone. Water may approach from an uphill area, paved surfaces, irrigation, roof drainage, or below ground. Ask the team to identify the relevant sources and show how each is managed.
Allan Block states that its toe drain and wall rock remove incidental water and are not the primary route for managing water above or below ground. Its guidance also directs builders to consult an engineer when groundwater is encountered. See the manufacturer’s water management guidance.
That distinction belongs in the project discussion. A detail intended for occasional moisture should not be assumed capable of accepting a concentrated flow. Ask for confirmation of the design conditions behind each proposed component.
2. Obtain structural and geotechnical design input
Water management and wall stability need coordinated review. The relevant professionals should assess the soil, site levels, surrounding loads, groundwater conditions, and proposed wall system. Their scope should explain what information has been established and what remains to be investigated.
Do not assume that a wall is safe because it is below a familiar height or because a standard block detail is available. Site conditions and loading can change what design is required. Nearby structures, slopes, vehicle areas, and services should be identified for professional assessment.
For retaining wall drainage, request a design package that connects the wall section to the grading and drainage drawings. If separate consultants prepare those documents, identify who resolves conflicts between them. The construction team needs one approved arrangement rather than several plausible details that do not match.
3. Map retaining wall drainage sources and flow paths
A simple site plan can record the wall alignment, higher ground, paved areas, roof outlets, and visible wet locations. Use this information to guide the designer’s review. Observations from different weather conditions can be helpful when they are accurately dated and described.
Separate surface flow from groundwater in the project brief. A wet patch does not by itself establish its source, and a dry inspection day does not exclude a seasonal problem. Where the source is uncertain, ask what investigation is appropriate before the design is finalized.
Review future uses as well as current conditions. Landscaping, irrigation, new paving, or an extension may change where water travels. Document the assumed finished levels and drainage connections so that later work can be checked against the original design.
4. Confirm an appropriate discharge route
A drainage proposal is incomplete until the outlet is defined. The project team should establish where collected water can be discharged, whether permissions or connection approvals apply, and how the receiving route will be maintained. A pipe ending outside the drawing boundary does not answer those questions.
Ask the designer to review the outlet’s relationship to nearby buildings, access routes, slopes, and neighboring land. The discharge should be suitable for the site and relevant requirements. Do not presume that directing water toward a lower area is automatically acceptable.
For retaining wall drainage, include outlet locations and access arrangements in the approved plans. Resolve who provides the downstream connection and who verifies it. This prevents a completed wall from concealing a collection system that has nowhere appropriate to discharge.
5. Specify compatible materials and filters
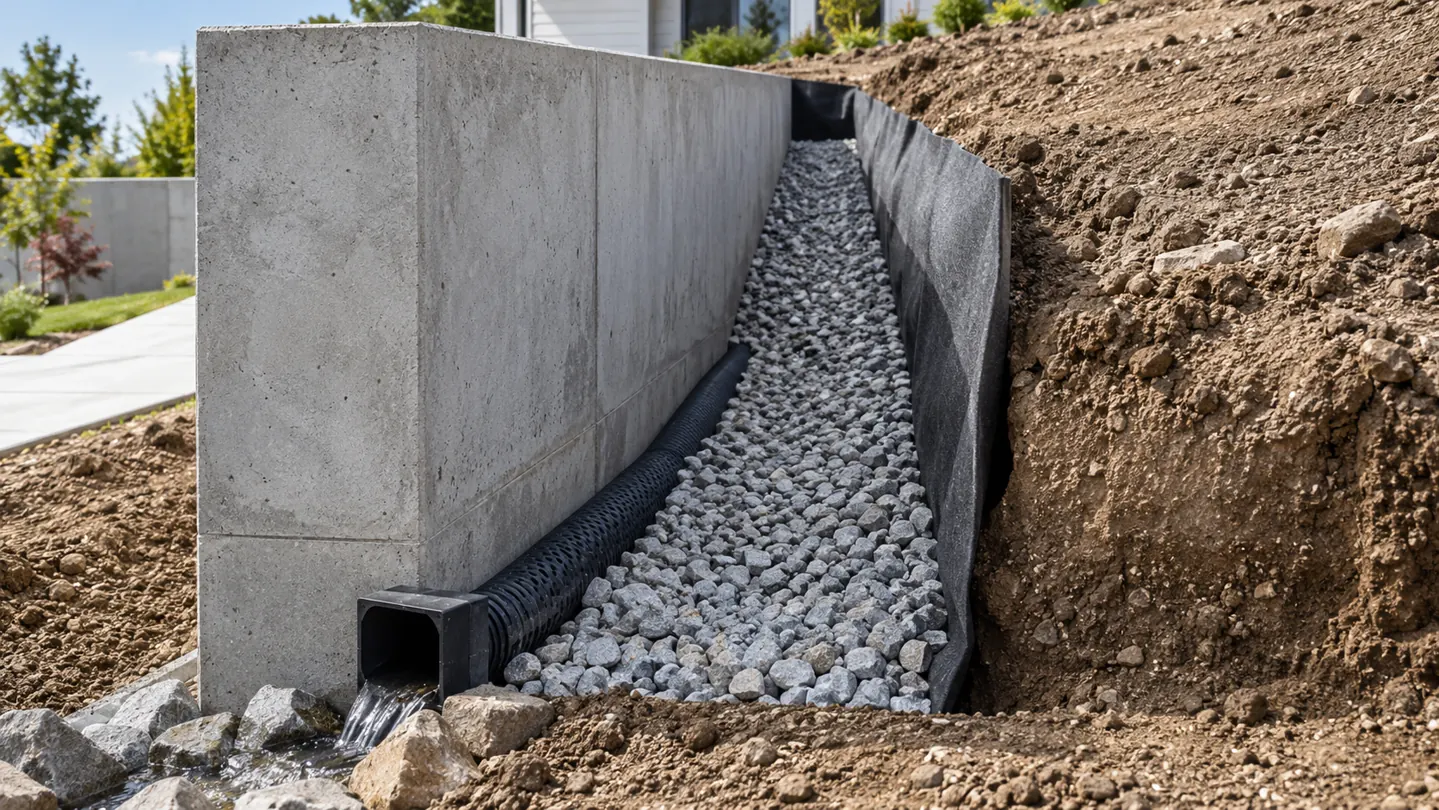
The specification should define the drainage material, pipes where required, and any filter or separation measures appropriate to the soil and system. Material selection needs to account for the actual design rather than a generic description such as gravel and fabric.
Allan Block’s guidance identifies protection from migration of fine material as a drainage requirement. The project designer should determine how that protection is achieved for the site’s soil and chosen wall arrangement. A fabric selected without considering soil compatibility may not satisfy the intended function.
Review material submissions before delivery. Record the accepted product or grading requirements and the inspection method. If a proposed substitution changes the drainage or filter arrangement, obtain design review before installation. Appearance alone does not establish that two materials are interchangeable.
6. Coordinate construction and inspection hold points
A wall project needs a sequence that preserves the approved drainage arrangement as construction progresses. Discuss temporary water management, storage areas, weather exposure, and the point at which concealed work will be inspected. These considerations should appear in the contractor’s method and inspection plan.
For retaining wall drainage, useful hold points include checking the approved materials, confirming the outlet route, and recording concealed connections before backfilling prevents access. The designer or responsible inspector should establish the specific acceptance requirements for the project.
Keep photographs tied to a wall location, date, and drawing reference. General site photographs may not show whether a connection or material matches the design. The construction inspection checklist guide can help structure project records, while the wall’s approved documents define its technical acceptance criteria.
7. Preserve the design during landscaping
The area above and around a wall often changes after construction. A gardener may add beds, an owner may extend paving, or another contractor may relocate an outlet. Include these interfaces in handover so that subsequent work does not unknowingly conflict with the drainage plan.
Ask for a drawing showing relevant finished levels, protected access points, and drainage components that should remain available for inspection. Explain who should review proposed changes. The owner does not need to calculate the wall design to recognize when a modification requires professional input.
Avoid making retaining wall drainage dependent on an undocumented informal arrangement. If maintenance access crosses another area or relies on a separate property connection, record the relevant responsibility. The people managing the site should know where water goes and who can authorize changes to that route.
8. Respond carefully to warning signs
New bulging, displacement, cracks, erosion, persistent wet ground, or changing outlet behavior deserve professional assessment. These observations can help identify where to investigate, but they do not prove a particular failure mechanism. Record what has changed and when it was first noticed.
If a wall appears unstable, keep people away from the affected area and obtain appropriate engineering advice. Do not excavate behind it, remove supporting soil, or attempt a drainage repair as a trial solution. Such work can change the conditions supporting the wall.
For an assessment brief, provide available drawings, photographs, maintenance history, and descriptions of nearby changes. Aloda Construction Company’s services page outlines its service offering. Use the contact page to discuss the project scope and the specialist reviews needed before work proceeds.
9. Frequently asked questions
Is retaining wall drainage just a perforated pipe?
No. It includes the relevant water sources, site grading, collection components, soil and filter compatibility, and an appropriate outlet. The approved design should explain how these parts work together.
Does a low wall avoid the need for design review?
Height alone does not establish safety or the necessary drainage arrangement. Soil, groundwater, slopes, nearby loads, and the wall system need appropriate professional review.
Can drainage be added behind a leaning wall?
An unstable or moving wall needs engineering assessment first. Do not dig behind it or remove soil to install a pipe without an approved plan that addresses stability and the cause of the problem.