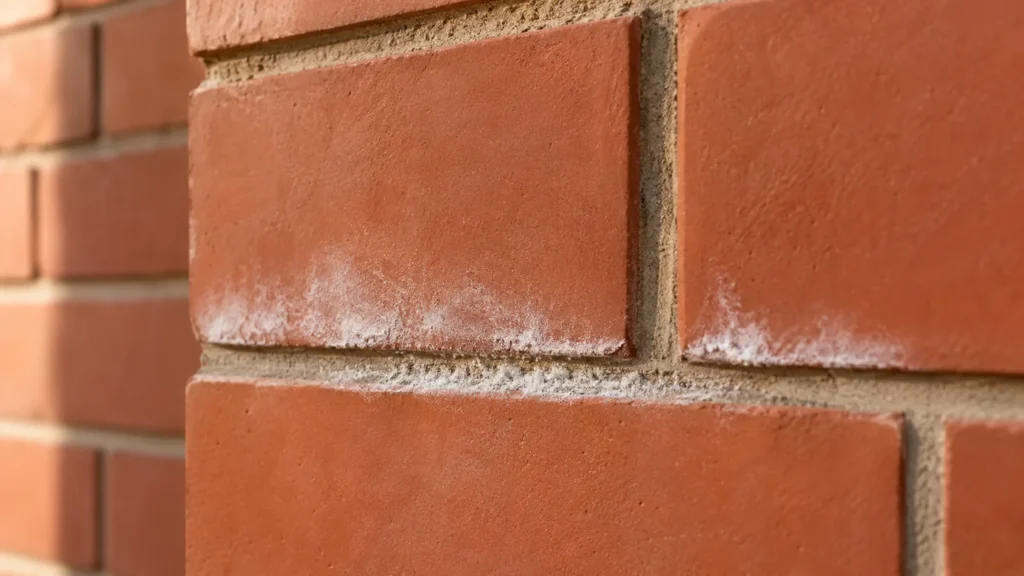
Efflorescence on brick is a deposit of soluble salts left behind as moisture moves through or across masonry and evaporates. Light powder on a recently built wall can fade as the brickwork dries. A patch that returns in the same place deserves a closer look at how water reaches that part of the wall. Photograph the deposit before anyone brushes it off. Its position and timing can tell you where to start looking for the moisture source.
Think of the visible mark as the last stop in a route. Water contacts salts in the masonry, adjoining materials or soil, carries them toward an exposed surface, and leaves them behind during drying. The brick that turns white may sit well below the point where water entered. Comparing two areas of the same wall is often more revealing than comparing photos of different buildings. Check where both areas get wet, how long each stays damp, and what sits immediately above them.
Table of Contents
1. Identify efflorescence on brick before treating the stain
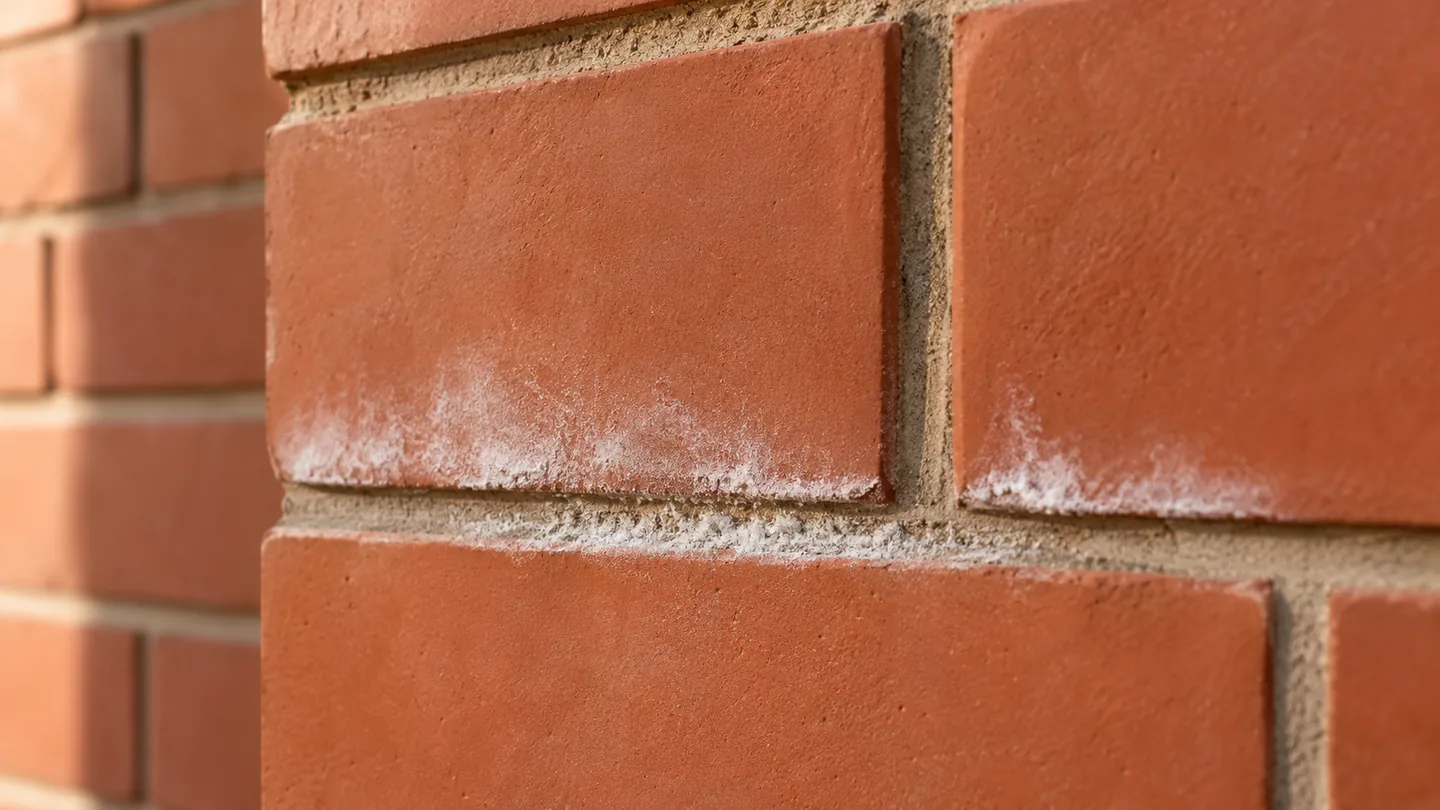
A fine, white, powdery or crystalline deposit on otherwise sound brick and mortar is consistent with efflorescence on brick. Look at the wall when it is dry, since some deposits are hard to see while wet. A dry photograph with a wider view shows whether the material follows mortar joints, covers individual bricks, or spreads in streaks from a ledge. Record the texture too. A soft powder that comes away gently and a hard white crust call for different investigations.
A pale smear present since laying could be mortar residue. A hard white run below a joint can be a lime deposit, while a pale mark beside a downpipe might be a stain from runoff. Where brick faces are flaking or joints crumble, document that damage alongside the deposit. A masonry specialist can identify an uncertain deposit and review the condition of the wall before a cleaning method is selected. See the Brick Industry Association’s guidance on causes and prevention.
2. Separate a drying-out bloom from a recurring problem
Efflorescence on brick can appear over broad areas on a recently completed building as moisture from construction leaves the wall. If the powder becomes less extensive over successive dry periods and the masonry remains sound, observation may be all the wall needs. Take a photograph from the same position in similar light at each visit. Include a joint or another fixed feature in the frame so the boundary of the patch is easy to compare over time.
A fresh patch appearing at one window after wind-driven rain tells a different story from a haze that fades across an entire elevation. Record when the patch appears and how long the surrounding area remains damp, then compare it with the next window of the same design. Efflorescence on brick may also become visible only after the rain stops and the wall starts to dry. A record that includes both the wetting and drying stages is more informative than a single inspection.
3. Trace wetting from the top of the wall downward
For efflorescence on brick below a coping, sill or roof edge, look at the details above it first. A failed coping joint can admit water into a parapet. A sill that sheds water onto the brick face can wet a narrow strip each time it rains. A leaking gutter can soak the wall behind it and leave a deposit lower down. Photograph the joints and edges where runoff changes direction, and look for weathering patterns on nearby surfaces.
Then compare the mark with the building drawings, if available. In a drained brick veneer, the outer brick and the cavity behind it perform different jobs. Flashing at openings and at the base is meant to direct water out through weeps. A deposit just above a line of weeps can suggest concentrated drying around that level. It can also coincide with an obstructed drainage path. Check the surrounding details against the intended wall design using this guide to building envelopes and their failure points.
4. Check ground moisture and nearby water sources
Efflorescence on brick near the ground can develop where soil, paving or irrigation repeatedly wets the wall. Look for soil or paving that has been raised against brickwork, a downpipe that discharges beside the wall, or a sprinkler that reaches the masonry. A continuous band around one corner may align with a raised planter. A patch that stops exactly where watering stops gives you a source to investigate before opening the wall or commissioning a treatment.
Ground-level deposits can also have several causes at once. A paved path might slope toward the wall while a defective drain keeps the adjacent soil wet. Below-grade walls need a different assessment from brick veneer above a planting bed. On the inside of a building, compare the affected area with nearby plumbing, floor junctions, and conditions that could produce condensation. The position of a band alone cannot establish which moisture path is active, even if the pattern looks familiar.
5. Match the repair to the water path
When the pattern points to a source, choose a repair that changes how water reaches or leaves the masonry. A leaking gutter needs repair and a check of its discharge. Open joints at a coping need a compatible repair that preserves the way the coping sheds water. If efflorescence on brick recurs beneath a window, the detail may require an inspection of the flashing and end conditions behind the brick, especially if the mark aligns with one corner of the opening.
Keep intentional drainage openings clear. Filling a weep or coating the face over a damp patch can interfere with the intended drying or drainage route. For suspected concealed faults, an experienced investigator can choose an inspection point, confirm the wall build-up and check the parts you cannot see from the ground. Where deteriorated mortar or loose units are present, include their condition in the scope so the work addresses both the moisture route and the damaged masonry.
6. Start with the mildest suitable cleaning method
Once the moisture source is addressed and the wall has had time to dry, light efflorescence on brick may come away with gentle dry brushing using a suitable nonmetallic brush. On compatible brickwork, test a discreet patch and check it in daylight when dry. Look at the mortar as well as the brick face. A cleaning method can clear the powder and still leave a conspicuous change in texture or color if it abrades the surface or exposes the aggregate in the joints.
For a stubborn deposit, seek a cleaner and method approved for the particular brick and mortar. Give the cleaning crew a sample area to demonstrate the result, and ask how they will protect adjoining metals, glass and finishes and control runoff. Aggressive washing can saturate the wall, and inappropriate acids can discolor brick or attack mortar. A successful trial comes down to how the finished wall looks once dry. See the Brick Industry Association’s technical note on cleaning brickwork.
7. Prevent another bloom during construction and repair
Site handling can lower the risk of efflorescence on brick before a wall is laid. Store masonry materials away from soil and standing water, and keep them covered against precipitation. Protect unfinished wall tops during work breaks so rainfall does not soak the wall from above. Where brick veneer relies on a cavity, inspect flashing and drainage openings before the work hides them. A photograph taken at that stage can later show exactly where the flashings turn up and where they discharge.
Repairs deserve the same attention to sequence. If a coping is removed, agree how the exposed wall will be protected until the new work is complete. For repointing, select materials appropriate to the existing brickwork and plan how to keep the wall protected while the repair cures. The people specifying a repair and those carrying it out should agree what the wall is expected to do during rain. Aloda’s construction services explain the types of work the company undertakes.
8. Verify that the repair changed the pattern
Mark the former boundary of the patch on a photo and keep a record of the repairs and their dates. After the next comparable rain or irrigation cycle, see whether the affected area stays drier and whether the deposit returns as it dries. Give the wall time to release moisture already inside it. A small amount of residual salt can appear during that period. If efflorescence on brick repeatedly returns in the same place, revisit the water-path diagnosis before scheduling another cleaning.
For a handover or maintenance record, include one close photo of the stain, one wider photo that shows the details around it, and a note about recent weather. Add what you observed after the repair and which areas still need checking. That record also makes it easier to brief a contractor without relying on memory. To discuss recurring efflorescence on brick, contact Aloda with photographs of the affected wall and the roof, opening or ground detail nearest the patch.
Frequently Asked Questions
Does white powder mean the brick is damaged?
A light surface deposit can be largely cosmetic. Repeated wetting, softened mortar, flaking brick or damp interior finishes warrant a closer look at the wall and the moisture source.
Can I paint over a wall that has salt deposits?
Investigate and correct the source of moisture first. Once the wall has dried and any recurring deposits are under control, assess whether a proposed coating suits the brick, the mortar and the wall assembly.
Why did the salts come back after brushing?
Brushing removes the deposit already on the surface. Moisture remaining within the wall can bring out more salts as the wall dries, and new wetting can restart the cycle. Compare when and where the deposit returns with the wall’s exposure to rain, irrigation or other water sources.