
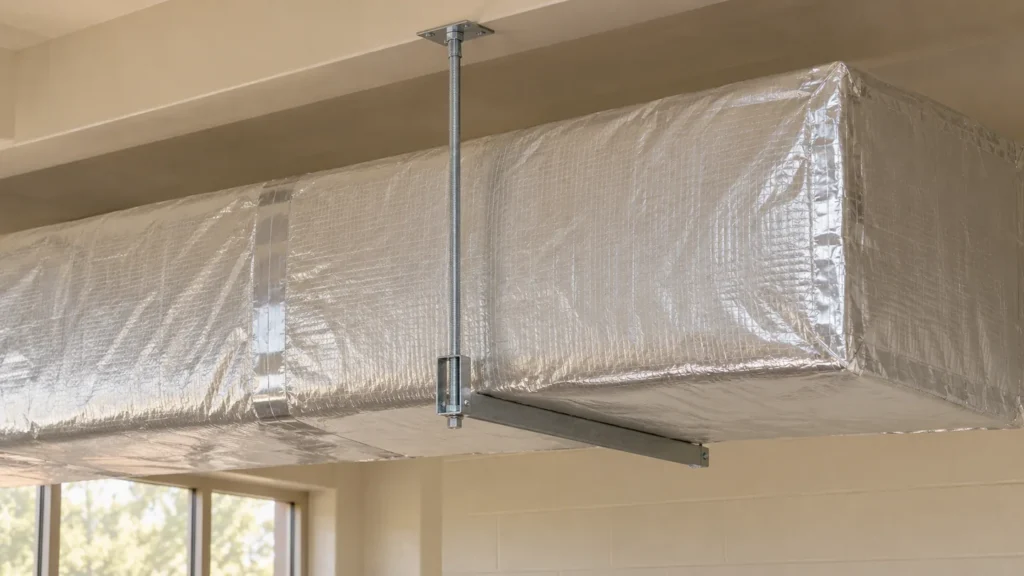
Duct insulation on the outside of a metal HVAC duct limits heat transfer between the air inside the duct and the space around it. On a cold supply duct, a correctly specified wrap and continuous vapor retarder can also reduce the risk of condensation. The work begins with clean, dry, air-sealed ductwork and ends with a check of the complete assembly. Corners, hangers, and access panels deserve as much attention as long straight runs.
An exterior wrap typically combines an insulating blanket with a facing. The blanket provides thermal resistance, while the facing and its sealed seams control moisture entry where a vapor retarder is needed. These layers serve different functions from an internal duct liner or the insulation used in walls and roofs. For an overview of insulation used elsewhere in the building, see the guide to building insulation materials.
Table of Contents
1. Map the Runs and Check the Conditions Around Them
Walk the route with the duct layout and identify where each section sits relative to the building’s conditioned space. A return duct in a conditioned corridor and a chilled supply duct above a humid loading area may face very different conditions. Record the function of each run, expected air temperature in service, and likely temperature and humidity around it. Also mark outside sections, transitions through exterior walls, and places that will become difficult to reach after other work proceeds.
On a retrofit, inspect the existing duct insulation for wetness, loose laps, bare metal, or compressed strips around supports. If a ceiling is stained, trace the stain to its source before proposing replacement. Moisture can come from a sweating duct, a leaking roof, or equipment above the stain. Ask whether the marks appear after long cooling cycles or after rain. That history helps the contractor distinguish conditions that affect the wrap from an unrelated source of water.
2. Specify Duct Insulation by Installed Performance
Select a wrap that is suitable for the duct material, operating temperature, and exposure. State the thermal resistance required in service and check the manufacturer’s published installed value. The label may show a different value for material straight out of the package because a blanket can compress during installation. Also check the space available for the specified thickness at structural crossings and above access panels. A tight gap may require a coordinated route or a different approved insulation system.
The specification should identify the facing and compatible materials for seams, terminations, and repairs. Check the fire and smoke requirements that apply to the assembly and its location. When condensation is a concern, assess the expected dew point of the surrounding air as well as the supply temperature. A single thickness based only on what fit a previous project can leave the new installation vulnerable. For examples of how wrap performance is reported, see the Johns Manville guide to installed R-value.
3. Seal the Metal Duct Before Covering It
Have the installer check the condition of the metal, fasteners, and support before applying duct insulation. Repair loose joints and use a duct sealant compatible with the construction and the project’s requirements. Inspect branch takeoffs, plenums, equipment connections, and joints at changes of direction. Ask how any specified air leakage test will be performed before those details disappear under the wrap. At that stage, defects are easier to find and repair without cutting the new facing.
Duct sealing controls air that would otherwise pass through gaps in the duct itself. Sealing the wrap facing provides a continuous outer layer for vapor control where required. Check both operations before closing a ceiling, especially where they are done by different crews. A cold air leak can chill nearby surfaces and produce local condensation even when the surrounding duct insulation looks intact. For the sequence on sheet metal systems, see the Building America guide to sealed and insulated metal ducts.
4. Fit the Wrap Around Corners and Fittings
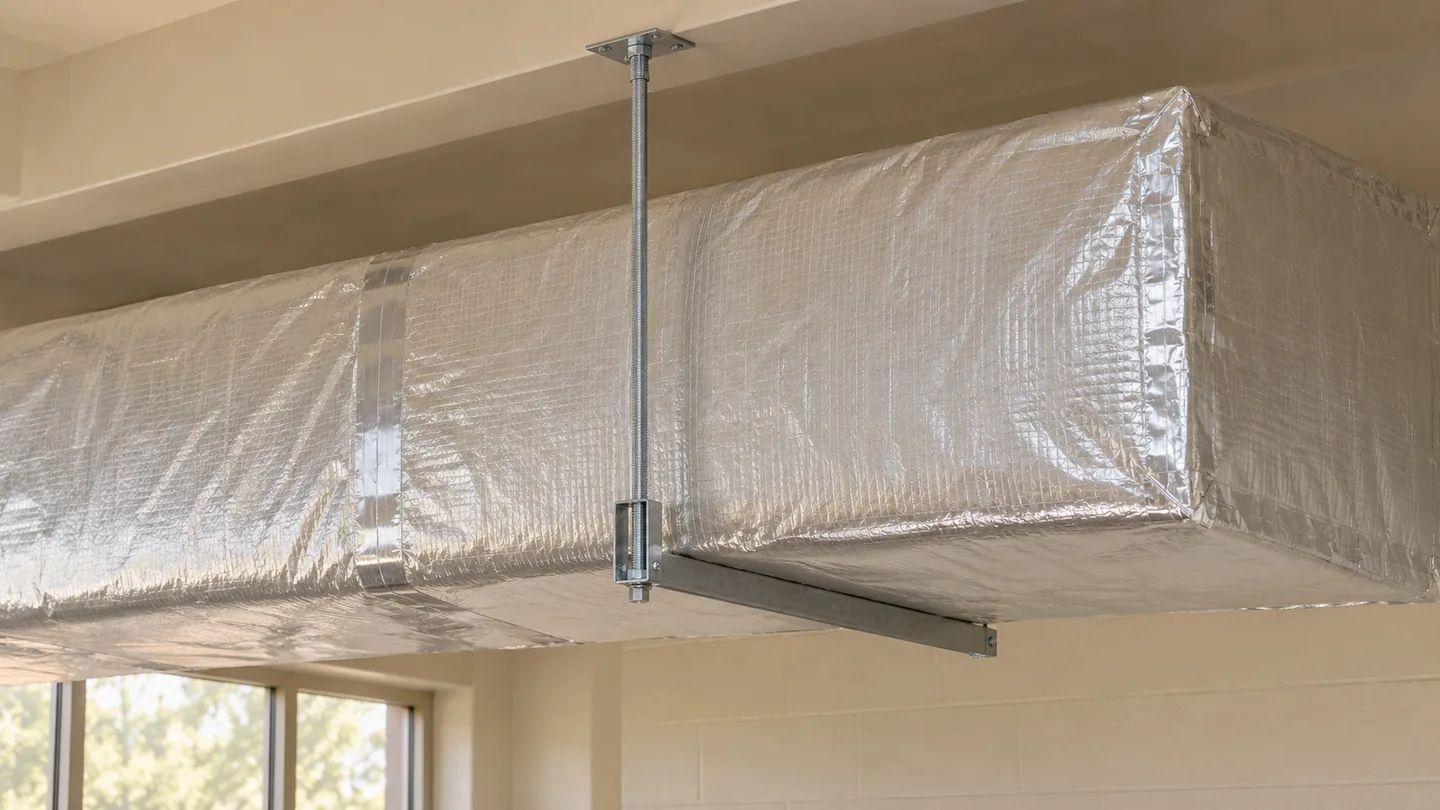
Measure the wrap using the product instructions for the duct shape and size. Allow for the intended thickness around the perimeter and the facing overlap at the seam. An undersized cut can pull tight across corners, thinning the insulation where continuity matters. An oversized piece can sag beneath the duct and make the seam difficult to secure. On wide rectangular runs, check what the manufacturer specifies for fastening or supporting the wrap along the underside.
Treat elbows, reducers, branch collars, and end caps as separate details during the takeoff. Dry-fitting shaped pieces can help the crew keep the full thickness around an irregular connection. Where a boot or transition forms part of the insulated run, carry the wrap to the specified termination and seal the facing there. Inspect the back and underside with suitable access before adjacent services block the view. Small exposed strips in these locations are easy to miss from below.
On a job with repeated fittings, agree on a sample section of duct insulation before the crew wraps an entire run. Include a typical corner, joint, and branch collar so the installer and inspector can review the same details. Check how the facing overlaps and where it needs fastening. Record the accepted method and repeat that detail where the duct geometry and conditions are similar. This gives the crew a reference when the same junction appears later above a crowded ceiling.
5. Maintain Continuous Vapor Control
When cold ductwork runs through humid air, moisture can reach the metal through a torn facing or a loose lap. Condensation forms if the surface is below the dew point of the air that reaches it. In an exterior duct insulation system that requires a vapor retarder, seal all seams and use compatible details at penetrations to maintain continuity. Use the facing manufacturer’s approved tape or sealant and follow its preparation instructions, including any requirements for clean, dry surfaces.
Check every change of direction and every point where the facing has been cut to fit around a support or access opening. A thin patch of duct insulation can lower the temperature of the facing and allow condensation on the outside even if the seams are sound. If moisture persists, verify the surrounding humidity and operating temperature, inspect for air leakage, and check the installed thickness. These observations guide whether to repair a seam, change the detail, or review the design conditions.
6. Coordinate Supports and Maintenance Access
The duct supports carry the metal duct and its installed components. Plan any insulation support or fastening separately, using the details approved for the assembly. At each hanger, confirm how the duct insulation will retain its thickness and how the facing will remain continuous. A tight band around a soft blanket can compress it, and a sharp support edge can cut the facing. Agree on the support and insulation details before the ceiling becomes crowded with other services.
Locate access doors, damper handles, test points, labels, and service panels on the drawing before work starts. Each item should remain usable with the wrap and ceiling in place. Use a compatible removable detail where the duct insulation must be opened for maintenance, and identify how it will be resealed. Coordinate openings, clearances, and inspection access when defining the scope of construction and maintenance services.
7. Protect Exposed Runs from Weather and Damage
For an outdoor duct, select an assembly with protection suitable for rain, sun, wind, and expected mechanical exposure. The ordinary facing on an indoor blanket may need a separate weather-resistant jacket. Detail joints and transitions so rain sheds away from openings and terminations. At roof or wall penetrations, coordinate the protection with the flashing and building envelope details. Ask how access panels will open and close while preserving the exterior protection each time equipment is serviced.
The duct insulation and its outer protection should also suit locations where tools, storage, or routine maintenance could damage the facing. Review the underside and areas near walkway level as well as the top surface. If a jacket is dented or open at a lap, inspect below it for wet insulation and assess whether it can remain in place. Reinstating the cover alone can conceal trapped water and leave the thermal performance uncertain.
8. Inspect the Finished Work Before Concealment
Walk the full run while it is accessible and compare the duct insulation with the specification. Check the product identification, seam adhesion, coverage around fittings, and thickness at corners and supports. Confirm that access panels work and labels remain visible. Photograph critical details before the ceiling is closed. During normal operation, inspect accessible cold runs for moisture and record the surrounding conditions when it is found. A dry inspection on a mild day gives only a partial view of cooling-season performance.
Keep the approved product data, photos of concealed areas, and any duct leakage or commissioning results in the handover record. If repairs are required later, these records show which facing materials and closures were used. For an assessment, share the duct layout, whether the runs carry cooled or heated air, and photos of any damp areas or damaged wrap. Include how long the system had been operating when symptoms appeared. Send the details through the project inquiry form.
Frequently Asked Questions
Does exterior duct insulation stop air leaks?
Seal duct joints and connections before applying the wrap. The metal duct’s sealed joints retain the air it carries, while the insulation limits heat transfer and its facing provides vapor control where specified.
Why is a wrapped duct still sweating?
The facing may be colder than the surrounding air’s dew point, or moisture may be reaching the cold duct through gaps. Check for compressed or missing insulation, damaged seams, duct leakage, and operating conditions outside the design assumptions.
Can new duct wrap go over old insulation?
First inspect the old material and determine whether it is dry, sound, and suitable for retention. Have the installer verify how the new assembly will be supported and sealed and whether the combined layers can deliver the required performance.


